
Editor Overview
The editor has three main areas that work together:
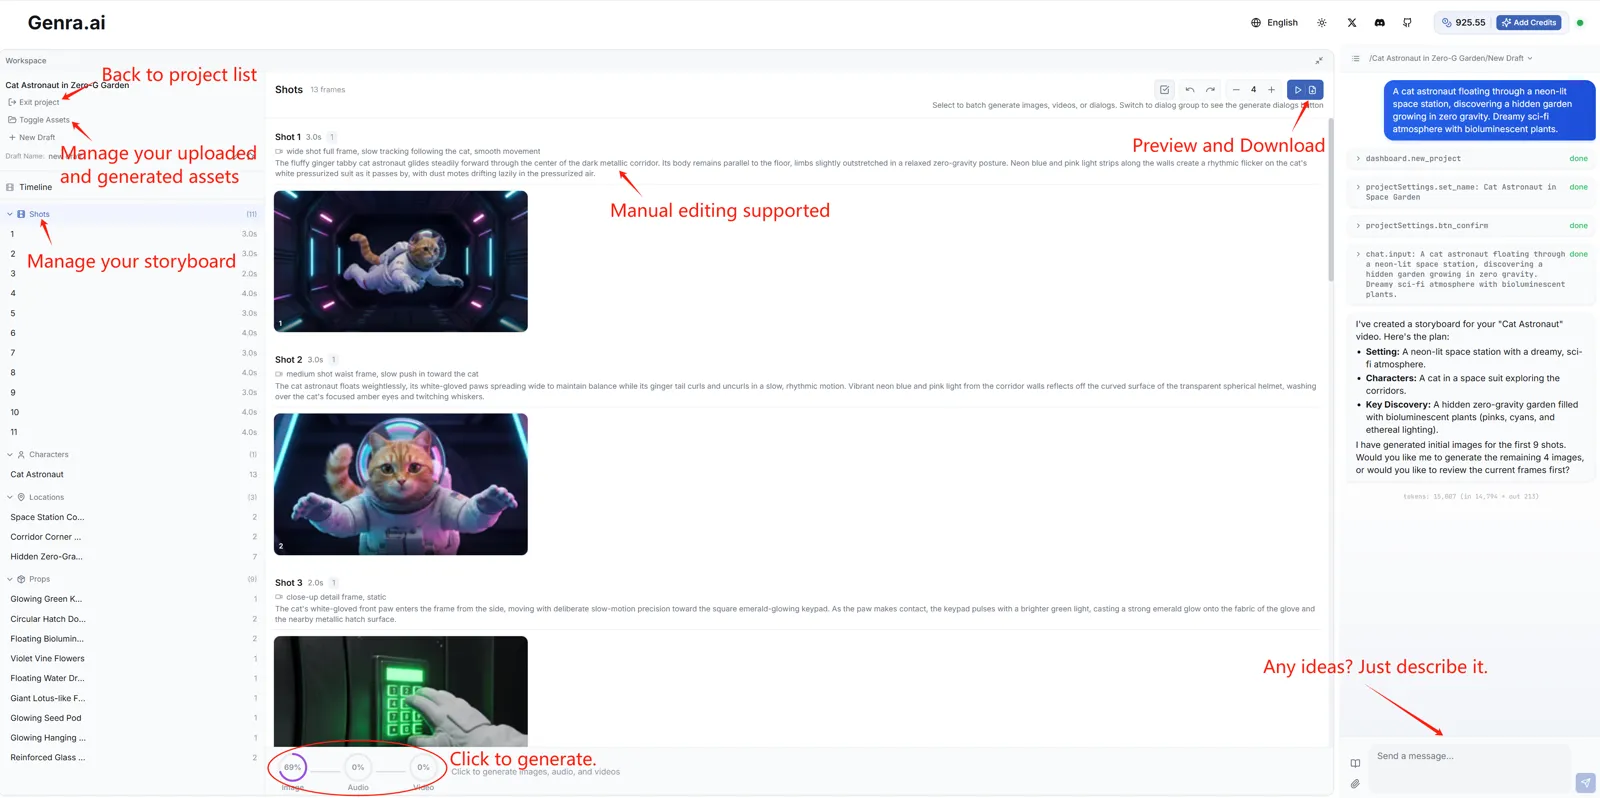
Left Sidebar
Your project hub — shows the current project name, draft management, and filter controls. Use filters to switch views by Shots, Characters, Dialogues, Scenes, and more.
Center — Frame Grid
Your visual workspace displaying all storyboard frames. Above it sits the toolbar with actions like Regenerate, Generate Video, Undo/Redo, and Play & Export.
Right — Chat Panel
Your creative brain. Chat with the AI here to build your story, modify scenes, add characters, and control every aspect of your video.

Step 1: Create Your Project
Method 1: Click "New Project" and Describe Your Idea
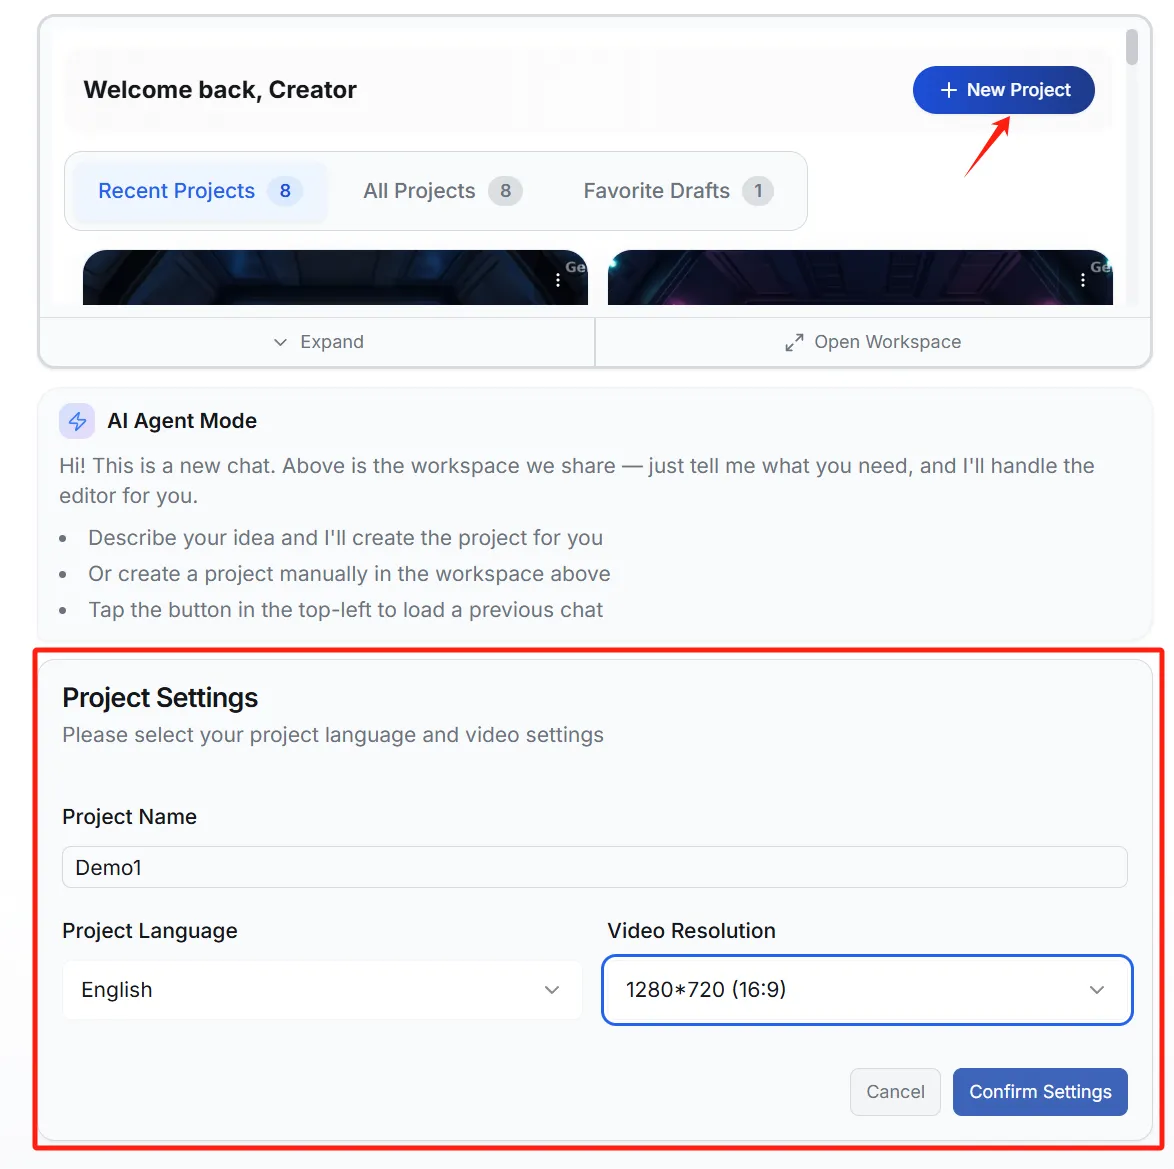
In the Workspace panel, click the "+ New Project" button. You'll see a Project Settings dialog where you configure:
- Project Name: Give your project a descriptive name.
- Language: Determines the language of generated scripts and dialogues (e.g., English, Chinese).
- Resolution: Choose your aspect ratio — 16:9 for YouTube/widescreen or 9:16 for TikTok/Reels.
Method 2: Type Your Idea Directly
Simply type your creative idea in the chat input box and send it. Genra will automatically create a new project and start generating the script and storyboard for you.
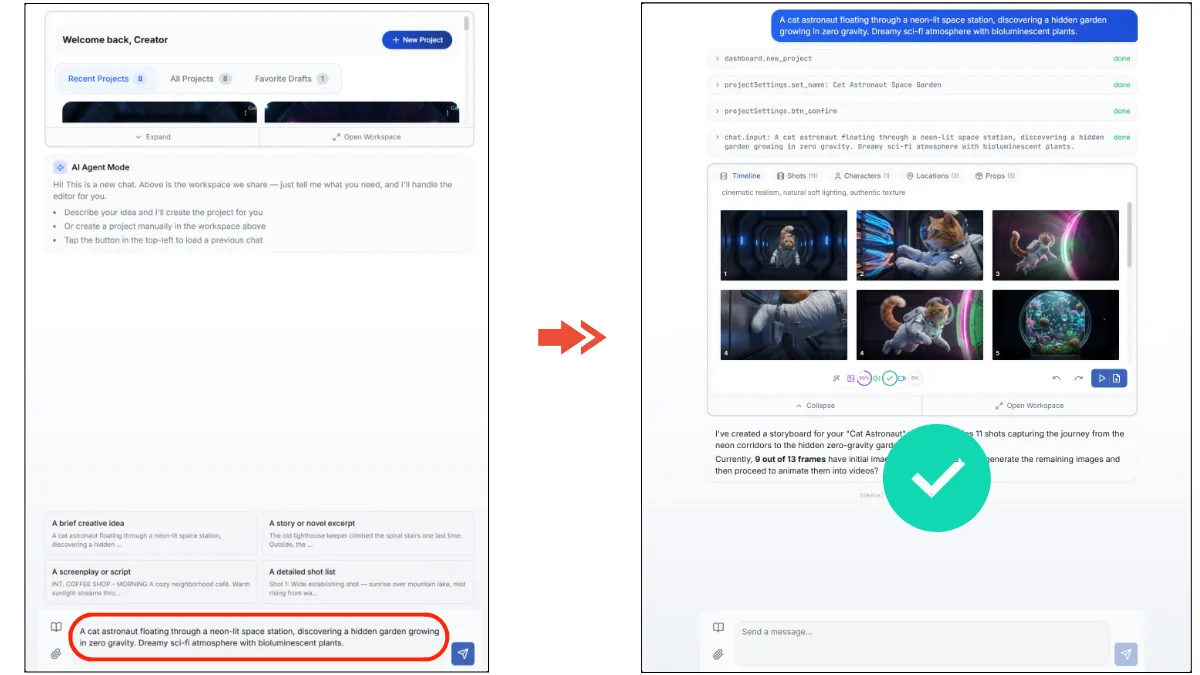
Once the project is created, the workspace will load your storyboard and you can start refining.
Step 2: Manage Your Generation
After sending your idea, Genra starts generating the script, characters, and storyboard frames. You can monitor and manage progress in the toolbar's progress bar at the bottom of the frame grid.
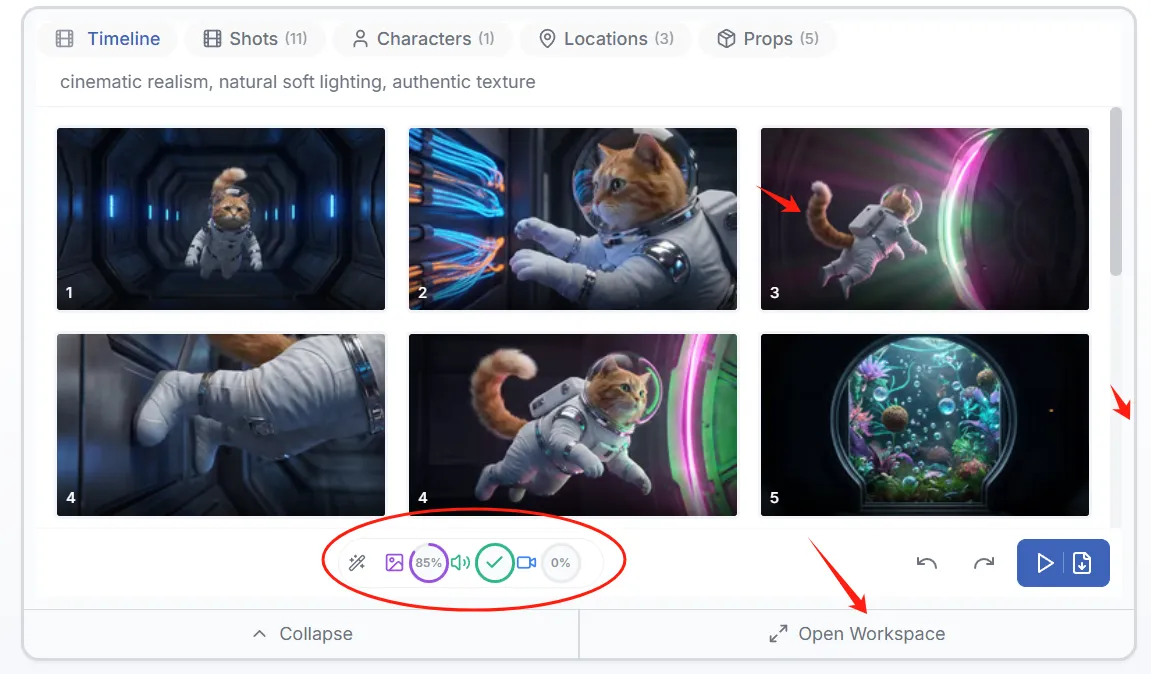

Click "Open Workspace" to enter the full project detail view.
Continue via Chat
Use the chat panel to give follow-up instructions at any time — add shots, change styles, adjust dialogue, or ask the AI to regenerate specific scenes.
Upload Reference Assets
Want the AI to reference specific images or styles? You can:
- Click the attachment icon in the chat input to upload files
- Open the Assets panel to upload new assets, or drag existing ones into the chat to reference them
Step 3: Refine Your Content
Use the filter controls in the left sidebar to switch between different editing views:
| View | What you can edit |
|---|---|
| Timeline | Edit global style descriptions and generate/preview background music. |
| Shots | Modify shot types (close-up, wide shot, etc.) and visual descriptions for each scene. |
| Characters | Define or update character appearances and assign AI-generated voices. |
| Dialogues | Edit script lines, select speakers, and fine-tune timing. |
| Scenes / Props | Manage environment and object descriptions to keep visuals consistent. |
You can also make changes by chatting — for example, "Change the ending to a cliffhanger" or "Make all shots cyberpunk style."
Step 4: Work with Frames
Frame Grid
- Zoom: Use the + / − buttons in the toolbar to adjust how many frames per row.
- Preview: Click any frame to open a large preview where you can edit it individually.
- Multi-select: Click the top-right corner of a frame to select one or multiple images.
Frame Actions
- Regenerate: Select frames and click Generate Images to regenerate them.
- Generate Video: Turn selected static frames into dynamic video clips.
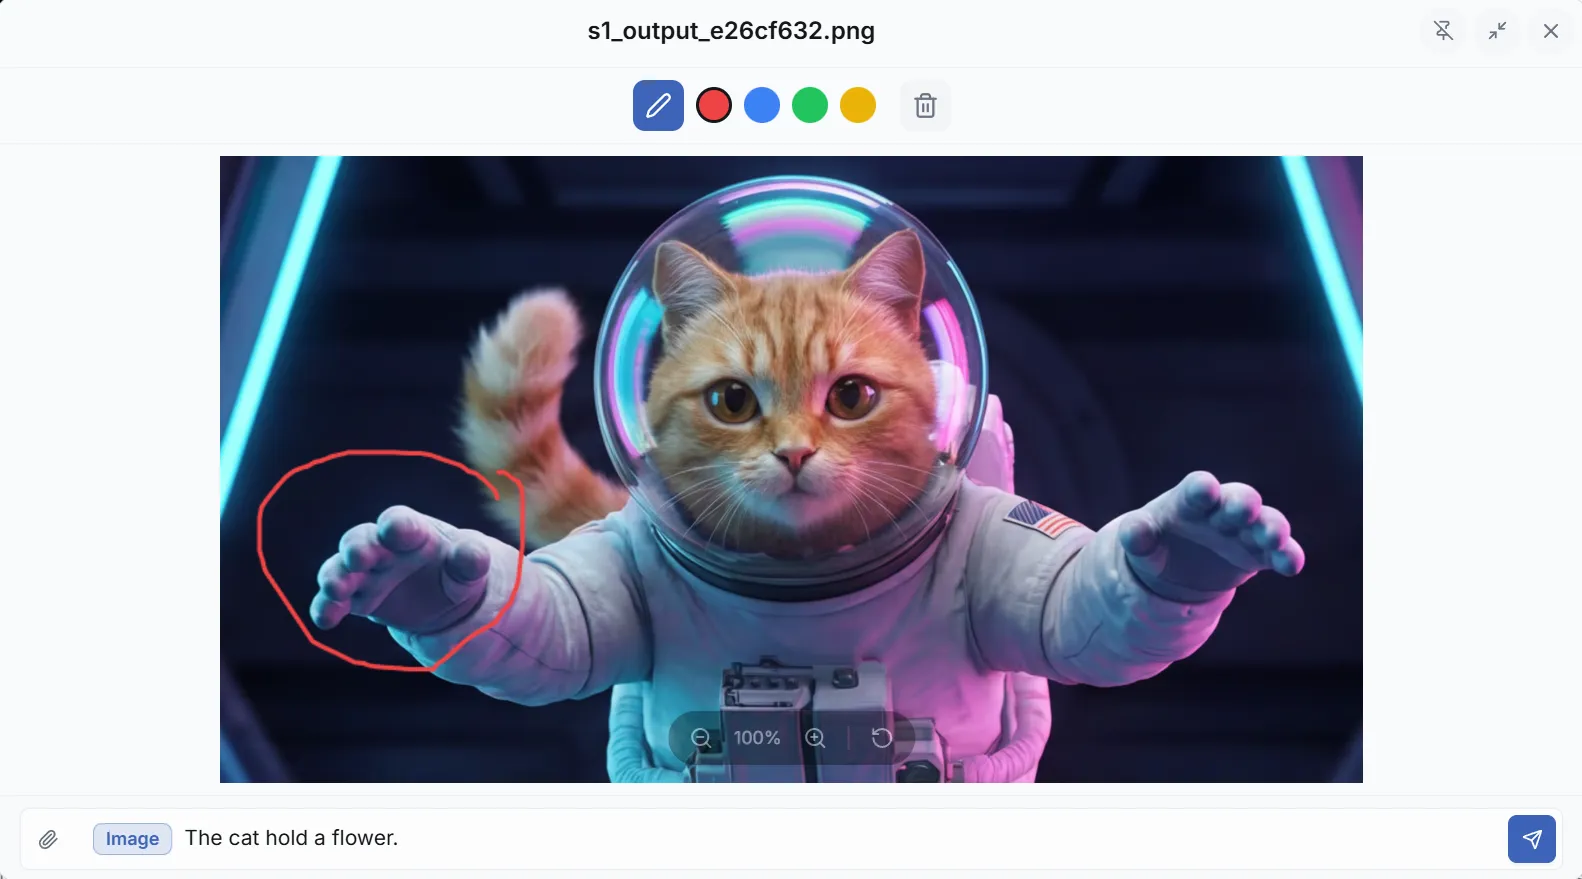
- Edit Image: Click on any frame image to modify it with text descriptions. Use the Brush tool for area-specific edits.
Step 5: Preview & Export
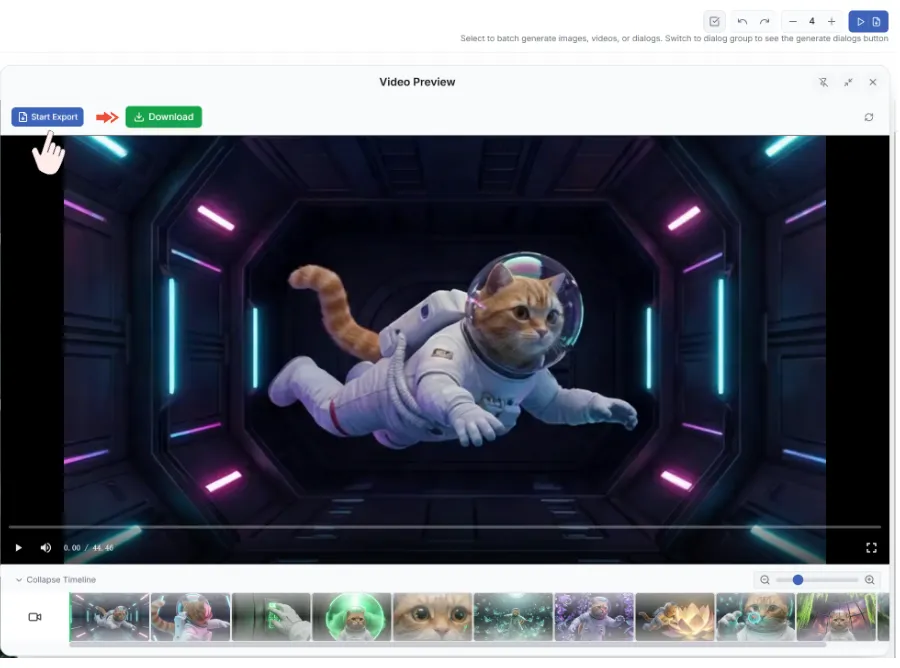
Preview: Click the Play & Export button in the toolbar to open the video preview panel.
Export: Click the Export button in the preview panel. A download link will appear once the video is rendered.
FAQ
Q: I'm not happy with my recent changes or some progress was lost — can I roll back to a previous version?
A: Yes — use the History feature to recover earlier versions any time. The button is right below the "Generate Video" button in the editor. Clicking it opens a panel of project snapshots taken at different points in time; you can preview any version and click Restore to roll back. Think of it as your safety net — especially useful when you're unhappy with the current generation, want to retrieve an earlier script, or need to recover from an unexpected timeline change made by the Agent, so you don't have to redo the work.
Q: How do I maintain character consistency?
A: Genra manages character consistency automatically — no manual work needed. If the results aren't ideal, you can add more character details in the chat and the AI will optimize accordingly.
Q: How long does generation take?
A: Images usually take under 30 seconds. Video clips may take 1-3 minutes depending on length and complexity (e.g., lip-sync).
Q: Can I switch between drafts?
A: Yes — click the session list above the input box to switch to any project session.
Q: What file types can I upload?
A: Images (JPG, PNG, WebP), videos (MP4), and audio files (MP3, WAV). Maximum 10MB per file.